Urolithin A powder blending: A blend can look uniform at the surface and still contain concentration differences from one sample location to another.
Urolithin A powder blending needs a defined material strategy, equipment sequence and sampling plan. When the ingredient is present at a low proportion, the main challenge is not simply mixing longer. It is distributing the powder without creating new segregation, protecting the target from loss on equipment surfaces and proving that the selected samples represent the whole batch.
This guide is for formulation scientists, process engineers, contract manufacturers, QA teams and technical buyers. It covers preblending, dilution, order of addition, equipment selection, blend-uniformity sampling, hold time, scale-up and troubleshooting. It is a process-development framework, not a finished-product manufacturing instruction or a universal formula.
Working rule: define the material, mixing mechanism and sampling design together; a blend result cannot be interpreted independently from the way it was made and sampled.
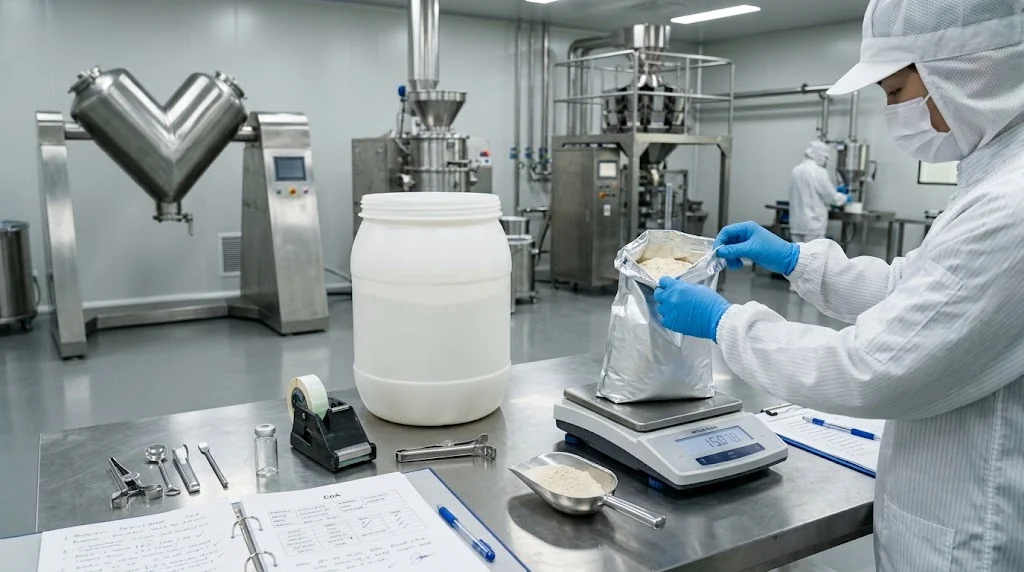
Urolithin A powder blending: what the study should establish
A Urolithin A powder blending study should show that the target ingredient is distributed within an agreed range throughout the defined batch and remains within that range through discharge or the next process step. The result depends on concentration, particle size, density, shape, moisture, electrostatics, equipment geometry and operator sequence.
Uniformity is not the same as a high assay from one composite sample. A composite can hide location-to-location differences. The study should therefore define where samples are taken, how many are tested and which statistical or specification rule is used.
Blending decision map
| Decision | Useful evidence | Additional check |
|---|---|---|
| Choose a preblend | Ingredient-to-carrier ratio, mixing sequence and recovery data | Small-scale trial and loss assessment |
| Select equipment | Shear, volume, fill level and discharge behaviour | Scale-specific performance study |
| Set mixing time | Time-course samples and endpoint rule | Overmixing and segregation check |
| Release a blend | Representative location samples and validated assay | In-process and finished-unit controls |
| Transfer to scale | Comparable mixing mechanism and process parameters | First-batch monitoring and trend review |
Use the Urolithin A specification framework to define the starting material, then build the blending study around the intended matrix and equipment.
Define the blend objective and critical quality attributes
Before choosing a mixer for Urolithin A powder blending, write the objective in measurable terms. Examples include a target concentration range, a maximum location-to-location variation, a defined discharge window or a recovery target after transfer. The objective should identify the material and process stage covered.
Critical attributes may include assay uniformity, moisture, particle distribution, density, flow, appearance, foreign matter and microbiological quality where relevant. Not every attribute needs the same sampling frequency, but each should have a reason for inclusion.
Blend brief fields
- Target ingredient, grade, assay basis and lot identity.
- Carrier or co-ingredients, ratio and particle-property range.
- Batch size, working volume and equipment type.
- Order of addition, preblend steps and transfer route.
- Mixing speed, time, shear and environmental conditions.
- Sampling locations, sample mass and acceptance rule.
- Hold time, discharge method and next processing step.
A clear brief prevents the team from treating a convenient laboratory beaker result as proof of commercial-scale performance.
Characterize the powders before blending
Material properties determine how powders move, pack and separate. Review particle-size distribution, density, shape, moisture, flow, electrostatic tendency and surface texture for the target and major carrier. Large differences can increase segregation during charging, mixing or discharge.
Use lot-specific values where possible. A typical supplier range may not describe the material in the batch selected for development. When a property is likely to control the process, include it in the incoming specification or development screen.
Property-mismatch checks
| Property | Question | Potential process effect |
|---|---|---|
| Particle size | Are the target and carrier in comparable ranges? | Fine material may migrate or form pockets |
| Density | How different are bulk and tapped values? | Vibration can separate dense and light fractions |
| Moisture | Do the powders condition differently? | Cohesion and flow may change during the run |
| Shape | Are surfaces smooth, angular, fibrous or plate-like? | Contact and segregation behaviour may differ |
| Electrostatics | Does the powder cling to tools or walls? | Transfer loss can change blend composition |
The Urolithin A product page provides the starting specification context; compare its physical-property fields with the actual lot before a blending trial.
Use a preblend for low-inclusion ingredients
In Urolithin A powder blending, a low-inclusion Urolithin A target can be difficult to distribute, so a preblend can improve distribution before the material enters the main mixer. The target is first combined with a defined portion of a compatible carrier, then the preblend is diluted stepwise into the remaining batch.
Preblending does not guarantee uniformity. The ratio, order, mixing energy, transfer loss and sampling plan still need evidence. A very small preblend may adhere to the vessel, while an overly long preblend may create segregation when discharged.
Preblend design questions
- What target-to-carrier ratio gives enough material for controlled handling?
- Does the carrier have comparable density and flow behaviour?
- How is the target weighed, screened or deagglomerated?
- How many dilution stages are used and what is the ratio at each stage?
- What transfer path and recovery check apply after the preblend?
- Will the preblend be used immediately or held before final mixing?
Document the preblend as its own intermediate with a lot number or batch reference. This makes loss, sampling and rework traceable.
Control the order of addition
Order of addition affects where the target powder travels and how quickly it becomes surrounded by carrier. A common approach is to place part of the carrier in the vessel, add the preblend, then add the remaining materials in defined portions. Other sequences may be appropriate for a high-shear or continuous process.
Test the sequence rather than copying a generic recipe. Adding a very fine powder onto a moving surface, for example, may create wall loss or local concentration before the main mixing mechanism reaches it.
Sequence-control record
| Step | Record | Reason |
|---|---|---|
| Initial charge | Material, mass and fill level | Sets the first mixing environment |
| Target addition | Location, rate, screening and container rinse | Controls local concentration and loss |
| Carrier addition | Portions, rate and pause time | Defines dilution and shear exposure |
| Final mixing | Speed, time and endpoint rule | Separates the process endpoint from operator judgement |
| Discharge | Order, rate, container and residual inspection | Checks segregation and recovery after mixing |
Record actual values, not only target settings. Small differences in addition rate or fill level can explain a later uniformity shift.
Choose equipment for Urolithin A powder blending by mixing mechanism
Ribbon, paddle, bin, high-shear, planetary and continuous mixers create different movement patterns. The right selection depends on batch size, powder cohesion, shear sensitivity, cleaning, containment, transfer and the desired discharge path.
A mixer with a large rated volume may perform poorly when the working fill is too low. Conversely, a high-shear unit may create heat, compaction or attrition that changes the powder. Evaluate the actual working range rather than the nameplate capacity.
Equipment-selection table
| Equipment factor | Review question | Evidence |
|---|---|---|
| Mixing mechanism | Does movement reach the full batch and wall areas? | Equipment description and trial observation |
| Working fill | Is the batch within the validated operating window? | Fill ratio and scale data |
| Shear and heat | Could the process change powder properties? | Temperature and physical-property checks |
| Containment | Can the target be charged and recovered without excessive loss? | Transfer and residual inspection |
| Discharge | Does the outlet empty evenly or create a concentration gradient? | Discharge samples and equipment trial |
For a scale-up decision, compare the mixing mechanism and specific energy rather than simply multiplying laboratory time by batch size.
Set mixing time with a time-course study
Mixing time should be an evidence-based range or endpoint, not a single number selected by habit. Take samples at planned intervals and examine both uniformity and physical behaviour. An early time point may show incomplete distribution; a later point may show no benefit or an increase in segregation during discharge.
Include the time needed for charging and discharge in the study. The blend can change after the mixer stops because vibration, transfer and container filling continue to move particles.
Time-course fields
- Initial, intermediate and final mixing times.
- Speed, fill level and environmental conditions.
- Location and number of samples at each time point.
- Assay result, variation and method repeatability.
- Appearance, density, flow or temperature observations.
- Discharge sequence and post-discharge sample results.
Choose an operating window that remains robust to normal equipment and material variation. Avoid an endpoint that works only at one exact minute.
Design representative blend-uniformity sampling
Sampling is often the weakest part of a Urolithin A powder blending study. Samples should cover the mixer, discharge stream, tote or final containers in a pattern that can detect stratification. A single top, middle and bottom composite may miss a narrow concentration band or a discharge shift.
Define sample mass, tools, locations, timing, compositing and laboratory preparation. Do not blend the samples together before measuring if the purpose is to assess location-to-location uniformity.
Sampling-plan table
| Sampling zone | Example locations | What it can reveal |
|---|---|---|
| Mixer body | Multiple vertical and radial positions | Dead zones, wall pockets or incomplete distribution |
| Discharge | Beginning, middle and end of flow | Segregation during emptying |
| Container fill | Early, middle and late filled units | Stratification during transfer |
| Replicate sample | Separate portions from one location | Sampling and assay repeatability |
When the batch is large or the ingredient is present at a low proportion, increase the number of locations rather than relying on a large composite. The sample plan should be justified by the process geometry.
Choose an assay method that can resolve blend variation
The assay method used for blend uniformity should be sufficiently precise at the target concentration and able to recover the ingredient from the actual matrix. Extraction, filtration, dilution, reference standard, detector response and sample mass can all influence the observed variation.
Before interpreting blend results, review method repeatability and recovery. A method with high noise can make a uniform blend look variable, while incomplete extraction can hide real differences.
Blend-assay checks
- Matrix and carrier do not interfere with the target response.
- Sample mass and extraction volume match the decision range.
- Independent preparations are used when preparation variation matters.
- Calibration and standard values are current and traceable.
- Method precision is smaller than the proposed uniformity window.
- Outliers are investigated under a written rule.
For a deeper analytical review, the technical resources page can support a request for method summaries and matrix-recovery evidence.
Set an acceptance rule for blend uniformity
Acceptance criteria should be defined before the study. They may use individual results, a mean, relative standard deviation, a range, a sampling-location rule or a combination. The criterion should match the product stage and the buyer’s approved quality system.
Do not use a passing average to override a clear location gradient. Conversely, do not reject a process based on one unexplained laboratory outlier without checking preparation and method performance.
Acceptance-rule questions
| Question | Why it matters | Record |
|---|---|---|
| What result is evaluated? | Individual, mean, RSD, range or profile | Approved calculation and formula |
| How many samples? | Determines the confidence in the location assessment | Sample count and rationale |
| What is the target basis? | As-is, dry basis, potency or another basis | Specification and method basis |
| What is an outlier? | Separates laboratory error from process variation | Investigation rule and approval |
| What happens after failure? | Defines hold, investigation, remix or rejection | Disposition pathway |
For finished dosage-unit requirements, consult the applicable standard and market rule. A bulk blend criterion is not automatically the same as a finished-unit uniformity requirement.
Control segregation after mixing
A blend can become less uniform after it leaves the mixer. Vibration, free-fall, pneumatic transfer, chute geometry, filling rate and container movement can separate particles by size or density. A uniform mixer sample therefore does not prove uniformity at the final fill point.
Use low-drop transfer where appropriate, minimize unnecessary handling and keep the discharge path consistent. Compare first, middle and last discharge samples during process development.
Segregation-risk checks
- Inspect the discharge for a visible change in texture or flow.
- Compare early, middle and late discharge assay results.
- Record drop height, vibration, transfer speed and container movement.
- Check whether the final package is filled by mass, volume or time.
- Assess hold time and movement before the next process step.
- Use a defined reblend or handling response if the criterion fails.
Segregation controls should be written into the batch record rather than left as operator preference.
Set blend hold time and storage controls
A blend may be held before encapsulation, compression, filling or shipment. During the hold, moisture, consolidation, electrostatics and density differences can change the material. Define the maximum hold time, container, environmental condition and test or inspection required before use.
Do not assume that a passing result immediately after mixing remains valid after a long hold or a package change. A hold-time study should use the actual container and process sequence.
Hold-time study fields
| Field | Record | Decision use |
|---|---|---|
| Starting blend | Lot, equipment, result and discharge status | Defines the baseline |
| Container | Liner, closure, fill level and label | Defines exposure and traceability |
| Condition | Temperature, humidity, light and movement | Represents actual storage |
| Time points | Planned hold intervals and sample locations | Shows when variation may develop |
| End check | Assay, physical observation and disposition | Sets the maximum supported hold |
Connect blend hold-time evidence to the site’s quality documentation framework when storage conditions or package exposure are part of the decision.
Scale the process by mechanism, not by clock time
Scale-up of Urolithin A powder blending should preserve the mixing mechanism, fill ratio, movement pattern and relevant energy input as far as practical. A ten-minute laboratory blend is not automatically equivalent to a ten-minute commercial blend.
Compare the laboratory, pilot and production equipment by volume, geometry, blade or paddle speed, tip speed, specific energy, shear, charge sequence and discharge. Identify which parameters are fixed, which are adjusted and which require confirmation at the new scale.
Scale-up comparison
| Parameter | Small scale | Production scale | Transfer question |
|---|---|---|---|
| Fill ratio | Working volume and mass | Working volume and mass | Does the powder see a similar movement pattern? |
| Mixing action | Speed, blade and direction | Speed, blade and direction | Is the mechanism comparable? |
| Addition | Manual or controlled rate | Feeder or charge sequence | Does local concentration remain controlled? |
| Discharge | Small vessel outlet | Chute, tote or filling line | Where could segregation begin? |
| Sampling | Defined small-batch locations | Expanded location plan | Can the larger batch be represented? |
Run a first-scale batch with enhanced sampling and a predefined review before reducing the monitoring frequency.
Investigate a failed uniformity result
When a blend fails, first confirm sample identity, preparation, assay method, calculations and instrument suitability. Then inspect the process for addition error, dead zones, inadequate dilution, wall loss, transfer segregation, moisture change or equipment loading.
Keep the original samples and data. A remix may be a valid process action only when the quality system allows it, the material status is controlled and the rework plan defines testing and traceability.
Investigation sequence
- Secure batch record, samples, calculations and equipment status.
- Confirm material identity, weights, lot numbers and addition order.
- Review assay recovery, method precision, dilution and outliers.
- Map the failed locations against mixer and discharge geometry.
- Check moisture, density, particle properties and hold history.
- Define remix, resample, rework or rejection under an approved plan.
- Record root cause, disposition and corrective action.
Repeated failures should trigger a process review or supplier change assessment rather than repeated informal mixing trials.
Document cleaning, recovery and cross-contact controls
Low-dose powders can remain on vessel walls, seals, screens, transfer hoses and sampling tools. The batch record should identify cleaning steps, visual inspection, recovery checks and any dedicated or shared equipment decision.
Cleaning evidence serves two purposes: it supports the mass balance for the target ingredient and shows that the next batch will not receive an uncontrolled residue from a prior operation. Define the acceptance criterion and sampling method for the equipment.
Equipment-clearance fields
- Equipment ID, configuration and previous product.
- Cleaning procedure, operator and completion time.
- Visual inspection of vessel, seals, screens and transfer path.
- Swab or rinse result where required by the quality system.
- Recovered material, waste quantity and mass-balance note.
- QA review before the next batch is charged.
Include the transfer and sampling tools in the same clearance scope. A clean mixer does not prove that the outlet and sample thief are clear.
Use a controlled batch record
The batch record should capture actual weights, lot numbers, equipment, sequence, settings, time, environmental observations, samples, deviations and approvals. Avoid a form that records only “mixed as instructed.”
When an operator changes a setting or pauses the process, record the time, reason and material status. These details often explain a later result more effectively than a longer laboratory report.
Batch-record minimum fields
| Section | Minimum information | Owner |
|---|---|---|
| Materials | Product, lot, quantity, weights and status | Operator and verifier |
| Equipment | ID, configuration, cleaning and fill level | Production and QA |
| Process | Addition order, speed, time, pauses and discharge | Operator |
| Sampling | Locations, portions, labels and transfer | Sampler |
| Testing | Method, results, calculations and review | Laboratory |
| Disposition | Release, hold, rework or rejection with approval | QA |
Archive the completed record with the raw-material lots and finished-product batch reference so the material path remains reconstructable.
Use process validation principles for the blending study
A blending process should be demonstrated under defined conditions with representative materials, equipment and sampling. The study should identify critical parameters, critical attributes, normal operating ranges and the evidence needed for routine monitoring.
The FDA process-validation guidance provides a useful reference for lifecycle thinking and process knowledge. Apply the framework to the buyer’s product category and quality system rather than copying a finished-product validation plan into a powder-blending project.
Build a blend-uniformity evidence package
A complete package lets another qualified reviewer understand how the process was selected and why the result supports the intended scale. Include material characterization, trial records, time-course data, sampling plan, method capability, scale-up comparison, hold-time evidence and deviation history.
Evidence-package index
| File | Minimum content | Decision supported |
|---|---|---|
| Material profile | Particle, density, moisture and flow data | Preblend and equipment choice |
| Development report | Ratios, order, time, speed and observations | Process window |
| Sampling plan | Locations, portions, method and acceptance rule | Uniformity interpretation |
| Analytical report | Recovery, precision, individual results and calculations | Result validity |
| Scale-up report | Equipment comparison, first-batch data and actions | Commercial transfer |
| Hold-time report | Container, condition, time points and conclusion | Maximum supported hold |
Use the technical resources area to organize document requests, while keeping the approved process record under the manufacturer’s quality system.
Build a buyer-side blending scorecard
A scorecard helps buyers distinguish a real process package from a supplier statement that only names a mixer and a time. Evaluate evidence against the intended scale and matrix.
Blending evidence scorecard
| Area | Strong evidence | Conditional evidence | Gap |
|---|---|---|---|
| Material | Target and carrier properties are characterized | Basic PSD and density data with trials pending | No material profile |
| Sequence | Preblend, addition and discharge are defined | Sequence described but not challenged | Operator judgement only |
| Sampling | Location plan represents mixer and discharge | Limited locations with rationale | One composite sample |
| Method | Recovery and precision support the uniformity window | Method summary available on request | Assay result without matrix evidence |
| Scale-up | Mechanism, fill and discharge are compared | First production batch is under enhanced review | Time simply copied across scales |
| Hold time | Container, conditions and maximum hold are supported | Short hold covered; longer period open | No hold control |
Use the scorecard to identify the next experiment or document. It does not replace process validation, finished-product testing, cleaning qualification or the buyer’s release procedure.
Frequently asked questions about Urolithin A powder blending
Is longer mixing always better?
No. Extra time may provide little benefit and can increase segregation, compaction, heat or wall loss. Use a time-course study and define an operating window supported by data.
Why use a preblend?
A preblend can distribute a low-inclusion ingredient into a manageable carrier portion before final dilution. Its ratio, transfer loss, hold time and uniformity still need verification.
How many blend samples are needed?
The number depends on batch geometry, risk, scale and the acceptance rule. Samples should cover the mixer and discharge rather than relying on one composite.
Can a lab-scale blender predict a commercial mixer?
Only when the relevant movement pattern, fill ratio, addition sequence and discharge behaviour are shown to be comparable. Clock time alone is not a scale-up basis.
What causes a blend to fail after passing in the mixer?
Discharge segregation, vibration, transfer drops, container filling, moisture change or sampling bias can create a difference after the mixer stops. Sample the discharge and final containers during development.
Should Urolithin A be tested in every blend sample?
The target assay is usually central to a uniformity decision, but the method must recover it from the actual matrix and have suitable precision. Supporting physical tests may be scheduled based on process risk.
Can a failed blend be remixed?
Only under an approved rework or remix procedure that defines material status, additional processing, sampling, testing and traceability. An informal second mixing step is not a controlled disposition.
Turn blending data into a scalable process
A defensible Urolithin A powder blending process links material properties, preblend design, order of addition, equipment, mixing time, discharge, sampling and hold conditions. The strongest evidence comes from the entire process path, not from a single uniformity result.
Before approving a scale-up, request the material profile, development report, sampling plan, assay capability, first-batch comparison and hold-time evidence. For a project-specific discussion, use the quality-file request form and include the target matrix, batch size, equipment and process stage.
Scope note: This article is a B2B ingredient and process-development framework. It does not replace the manufacturer’s validated process, cleaning program, quality agreement, regulatory assessment or finished-product release system.